Start all the services
Test web server
In a shell/command window, move into the openrem folder:
- Ubuntu linux:
/usr/local/lib/python2.7/dist-packages/openrem/ - Other linux:
/usr/lib/python2.7/site-packages/openrem/ - Linux virtualenv:
vitualenvfolder/lib/python2.7/site-packages/openrem/(remember to activate the virtualenv) - Windows:
C:\Python27\Lib\site-packages\openrem\ - Windows virtualenv:
virtualenvfolder\Lib\site-packages\openrem\(remember to activate the virtualenv)
Web access on OpenREM server only
Run the built in web server:
python manage.py runserver --insecure
In a web browser on the same computer, go to http://localhost:8000/ - you should now see the message about creating users. For full functionality start the Celery task queue before moving on to Configure the settings.
Web access on other computers
The built-in webserver only provides a service on the computer OpenREM is installed on by default (it’s only there
really for testing). To view the OpenREM interface on another computer, you need to modify the runserver command:
python manage.py runserver --insecure 0.0.0.0:8000
This will enable the web service to be available from other computers on the network. If your server has several
network cards and you want to restrict it to one, then you can use a real address rather than 0.0.0.0. Likewise you can
specify the port (here it is 8000).
In a web browser on a different computer on the same network, go to http://192.168.1.10:8000/ (changing the IP address to the one you are running the server on) and you should see the OpenREM interface and the message about creating users. For full functionality start the Celery task queue before moving on to Configure the settings.
Note
Why are we using the --insecure option? With DEBUG mode set to True
the test web server would serve up the static files. In this release,
DEBUG mode is set to False, which prevents the test web server
serving those files. The --insecure option allows them to be served again.
Celery task queue
Celery will have been automatically installed with OpenREM, and along with RabbitMQ allows for asynchronous task processing for imports, exports and DICOM networking tasks.
Note
Celery needs to be able to write to the place where the Celery logs and pid file are to be stored, so make sure:
- the folder exists (the suggestion below is to create a folder in the
MEDIA_ROOTlocation) - the user that starts Celery can write to that folder
You can put the folder wherever you like, for example you might like to create a /var/log/openrem/ folder on a linux
system.
If you are using the built-in Test web server then Celery and the webserver will be running as your user. If you are
running a production webserver, such as Apache or nginx on linux, then the user that runs those daemons will need to
be able to write to the MEDIA_ROOT and the Celery log files folder. In this case, you need to change the ownership
of the folders and change to the right user before running Celery. On Ubuntu:
mkdir /path/to/media/celery  # change as appropriate
sudo chown www-data /path/to/media  # change as appropriate
sudo su -p www-data
Now start celery…
Move into the openrem folder:
- Ubuntu linux:
/usr/local/lib/python2.7/dist-packages/openrem/ - Other linux:
/usr/lib/python2.7/site-packages/openrem/ - Linux virtualenv:
vitualenvfolder/lib/python2.7/site-packages/openrem/(remember to activate the virtualenv) - Windows:
C:\Python27\Lib\site-packages\openrem\ - Windows virtualenv:
virtualenvfolder\Lib\site-packages\openrem\(remember to activate the virtualenv)
Linux - \ is the line continuation character:
celery multi start default -Ofair -A openremproject -c 4 -Q default \
--pidfile=/path/to/media/celery/%N.pid --logfile=/path/to/media/celery/%N.log
Windows - celery multi doesn’t work on Windows, and ^ is the continuation character:
celery worker -n default -Ofair -A openremproject -c 4 -Q default ^
--pidfile=C:\path\to\media\celery\default.pid --logfile=C:\path\to\media\celery\default.log
Celery concurrency
Set the number of workers (concurrency, -c) according to how many processor cores you have available. The more you
have, the more processes (imports, exports, query-retrieve operations etc) can take place simultaneously. However, each
extra worker uses extra memory and if you have too many they will be competing for CPU resources too.
Problems with Celery 4 on Windows
Full support for Celery on Windows was dropped with version 4 due to lack of Windows based developers. Therefore
for Windows the instructions fix Celery at version 3.1.25 to retain full functionality.
To stop the celery queues in Linux:
celery multi stop default --pidfile=/path/to/media/celery/%N.pid
For Windows, just press Ctrl+c
You will need to do this twice if there are running tasks you wish to kill.
For production use, see Daemonising Celery below.
Celery task management: Flower
Flower will have been automatically installed with OpenREM and enables monitoring and management of Celery tasks.
You should start Flower with the same user that you started Celery with, and put the log file in the same place too.
Move into the openrem folder:
- Ubuntu linux:
/usr/local/lib/python2.7/dist-packages/openrem/ - Other linux:
/usr/lib/python2.7/site-packages/openrem/ - Linux virtualenv:
vitualenvfolder/lib/python2.7/site-packages/openrem/(remember to activate the virtualenv) - Windows:
C:\Python27\Lib\site-packages\openrem\ - Windows virtualenv:
virtualenvfolder\Lib\site-packages\openrem\(remember to activate the virtualenv)
If you need to change the default port from 5555 then you need to make the same change in
openremproject\local_settings.py to add/modify the line FLOWER_PORT = 5555
If you wish to be able to use the Flower management interface independently of OpenREM, then omit the --address
part of the command. Flower will then be available from any PC on the network at http://yourdoseservernameorIP:5555/
Linux - \ is the line continuation character:
celery flower -A openremproject --port=5555 --address=127.0.0.1  --loglevel=INFO \
---log-file-prefix=/path/to/media/celery/flower.log
Windows - ^ is the line continuation character:
celery flower -A openremproject --port=5555 --address=127.0.0.1  --loglevel=INFO ^
---log-file-prefix=C:\path\to\media\celery\flower.log
For production use, see Daemonising Celery below.
Celery periodic tasks: beat
Note
Celery beat is only required if you are using the Native DICOM store node with direct import. Please read the warnings there before deciding if you need to run Celery beat. At the current time, using a third party DICOM store service is recommended for most users. See the Third-party DICOM Stores documentation for more details
Celery beat is a scheduler. If it is running, then every 60 seconds a task is run to check if any of the DICOM
Store SCP nodes are set to keep_alive, and if they are, it tries to verify they are running with a DICOM echo.
If this is not successful, then the Store SCP is started.
To run celery beat, open a new shell and move into the openrem folder:
- Ubuntu linux:
/usr/local/lib/python2.7/dist-packages/openrem/ - Other linux:
/usr/lib/python2.7/site-packages/openrem/ - Linux virtualenv:
vitualenvfolder/lib/python2.7/site-packages/openrem/(remember to activate the virtualenv) - Windows:
C:\Python27\Lib\site-packages\openrem\ - Windows virtualenv:
virtualenvfolder\Lib\site-packages\openrem\(remember to activate the virtualenv)
Linux:
celery -A openremproject beat -s /path/to/media/celery/celerybeat-schedule \
-f /path/to/media/celery/celerybeat.log \
--pidfile=/path/to/media/celery/celerybeat.pid
Windows:
celery -A openremproject beat -s C:\path\to\media\celery\celerybeat-schedule ^
-f C:\path\to\media\celery\celerybeat.log ^
--pidfile=C:\path\to\media\celery\celerybeat.pid
For production use, see Daemonising Celery below
As with starting the Celery workers, the folder that the pid, log and for beat, schedule files are to be written must already exist and the user starting Celery beat must be able write to that folder.
To stop Celery beat, just press Ctrl+c
Configure the settings
- Follow the link presented on the front page to get to the user and group administration.

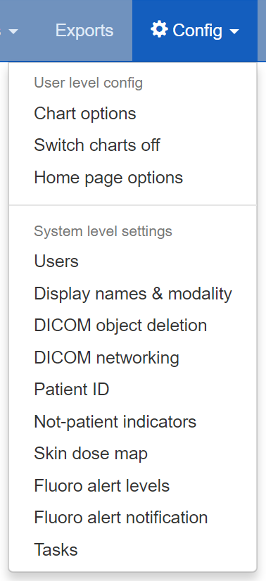
After the first users are configured, this link will no longer be presented and instead you can go to
Config -> Users.You will need the superuser username and password you created just after creating the database. The groups are
viewgroupcan browse the data onlyimportsizegroupcan use the csv import facility to add patient height and weight informationimportqrgroupcan use the DICOM query-retrieve facility to pull in studies, as long as they are pre-configuredexportgroupcan view and export data to a spreadsheetpidgroupcan search using patient names and IDs depending on settings, and export with patient names and IDs if they are also a member of theexportgroupadmingroupcan delete studies, configure DICOM Store/QR settings, configure DICOM keep or delete settings, configure patient ID settings, and abort and delete patient size import jobs. Members of the admingroup no longer inherit the other groups permissions.
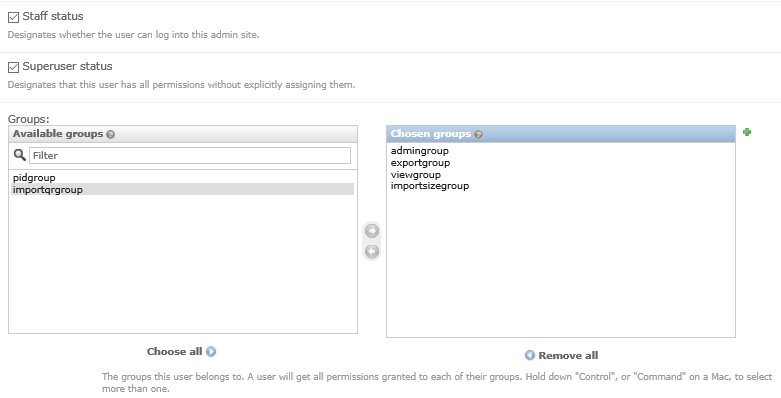
- In addition to adding users to these groups, you may like to grant a second user
superuserandstaffstatus so that there are at least two people who can manage the users - Return to the OpenREM interface (click on
View siteat the top right)

- Follow the link to see more information about how you want OpenREM to identify non-patient exposures, such as QA. See Not-patient indicator settings.
- Go to
Config -> DICOM object delete settingsand configure appropriately (see Delete objects configuration) - Go to
Config -> Patient ID settingsand configure appropriately (see Patient identifiable data) - If you want to use OpenREM as a DICOM store, or to use OpenREM to query remote systems, go to
Config -> Dicom network configuration. For more information go to Importing data to OpenREM. - With data in the system, you will want to go to
Config -> View and edit display namesand customise the display names. An established system will have several entries for each device, from each time the software version, station name or other elements changes. See Display names and user-defined modalities for more information