Start all the services
Test web server
In a shell/command window, move into the openrem folder:
Ubuntu linux:
/usr/local/lib/python2.7/dist-packages/openrem/Other linux:
/usr/lib/python2.7/site-packages/openrem/Linux virtualenv:
vitualenvfolder/lib/python2.7/site-packages/openrem/(remember to activate the virtualenv)Windows:
C:\Python27\Lib\site-packages\openrem\Windows virtualenv:
virtualenvfolder\Lib\site-packages\openrem\(remember to activate the virtualenv)
Web access on OpenREM server only
Run the built in web server:
python manage.py runserver --insecure
In a web browser on the same computer, go to http://localhost:8000/ - you should now see the message about creating users.
Web access on other computers
The built-in webserver only provides a service on the computer OpenREM is installed on by default (it’s only there
really for testing). To view the OpenREM interface on another computer, you need to modify the runserver command:
python manage.py runserver --insecure 0.0.0.0:8000
This will enable the web service to be available from other computers on the network. If your server has several
network cards and you want to restrict it to one, then you can use a real address rather than 0.0.0.0. Likewise you can
specify the port (here it is 8000).
In a web browser on a different computer on the same network, go to http://192.168.1.10:8000/ (changing the IP address to the one you are running the server on) and you should see the OpenREM interface and the message about creating users.
Note
Why are we using the --insecure option? With DEBUG mode set to True
the test web server would serve up the static files. In this release,
DEBUG mode is set to False, which prevents the test web server
serving those files. The --insecure option allows them to be served again.
Configure the settings
Follow the link presented on the front page to get to the user and group administration.

After the first users are configured, this link will no longer be presented and instead you can go to
Config -> Users.You will need the superuser username and password you created just after creating the database. The groups are
viewgroupcan browse the data onlyimportsizegroupcan use the csv import facility to add patient height and weight informationimportqrgroupcan use the DICOM query-retrieve facility to pull in studies, as long as they are pre-configuredexportgroupcan view and export data to a spreadsheetpidgroupcan search using patient names and IDs depending on settings, and export with patient names and IDs if they are also a member of theexportgroupadmingroupcan delete studies, configure DICOM Store/QR settings, configure DICOM keep or delete settings, configure patient ID settings, and abort and delete patient size import jobs. Members of the admingroup no longer inherit the other groups permissions.
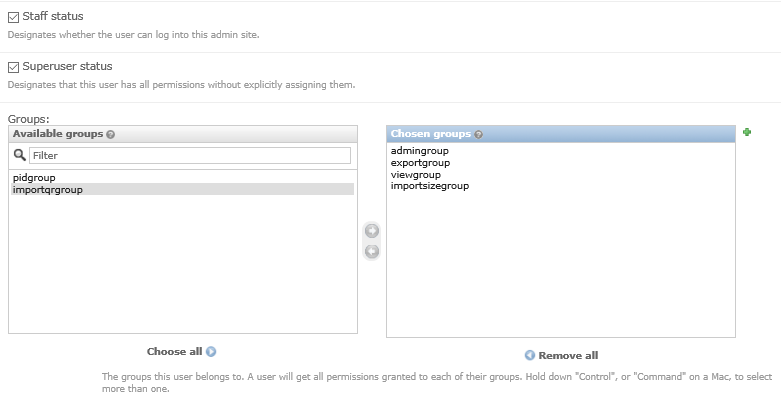
In addition to adding users to these groups, you may like to grant a second user
superuserandstaffstatus so that there are at least two people who can manage the usersReturn to the OpenREM interface (click on
View siteat the top right)

Follow the link to see more information about how you want OpenREM to identify non-patient exposures, such as QA. See Not-patient indicator settings.
Go to
Config -> DICOM object delete settingsand configure appropriately (see Delete objects configuration)Go to
Config -> Patient ID settingsand configure appropriately (see Patient identifiable data)If you want to use OpenREM as a DICOM store, or to use OpenREM to query remote systems, go to
Config -> Dicom network configuration. For more information go to Importing data to OpenREM.With data in the system, you will want to go to
Config -> View and edit display namesand customise the display names. An established system will have several entries for each device, from each time the software version, station name or other elements changes. See Display names and user-defined modalities for more information